
With the holiday season upon us, it’s the perfect time to get outside and take some photos! And what better subject than waves? Wave photography is fun, creative, and surprisingly easy to get into. The results look stunning — they make beautiful fine art prints, don’t require fancy gear or editing, and the whole experience is incredibly relaxing.
I often get asked how I create my slow shutter wave shots, so today I’m walking you through my entire process step-by-step.
What You’ll Need
Lens:
A zoom or telephoto lens is ideal — something like a 100–500mm. But really, whatever zoom you have will do the job.
Filters:
Use a circular polarizer to cut glare. If you’re shooting when the sun is bright (especially around midday), throw on a 3 or 6-stop ND filter to help control your exposure.
Tripod:
Not needed! This technique works great handheld.
Location:
Anywhere with waves — your local beach, a lake, or even small surf breaks. Don’t worry about them being huge; some of my favorite shots have come from little 1-metre waves.
If you can, find a slightly elevated spot to shoot from. A bit of height helps clean up your background and gives the waves more visual separation. Shooting from the beach, rocks, or shoreline also works perfectly fine.
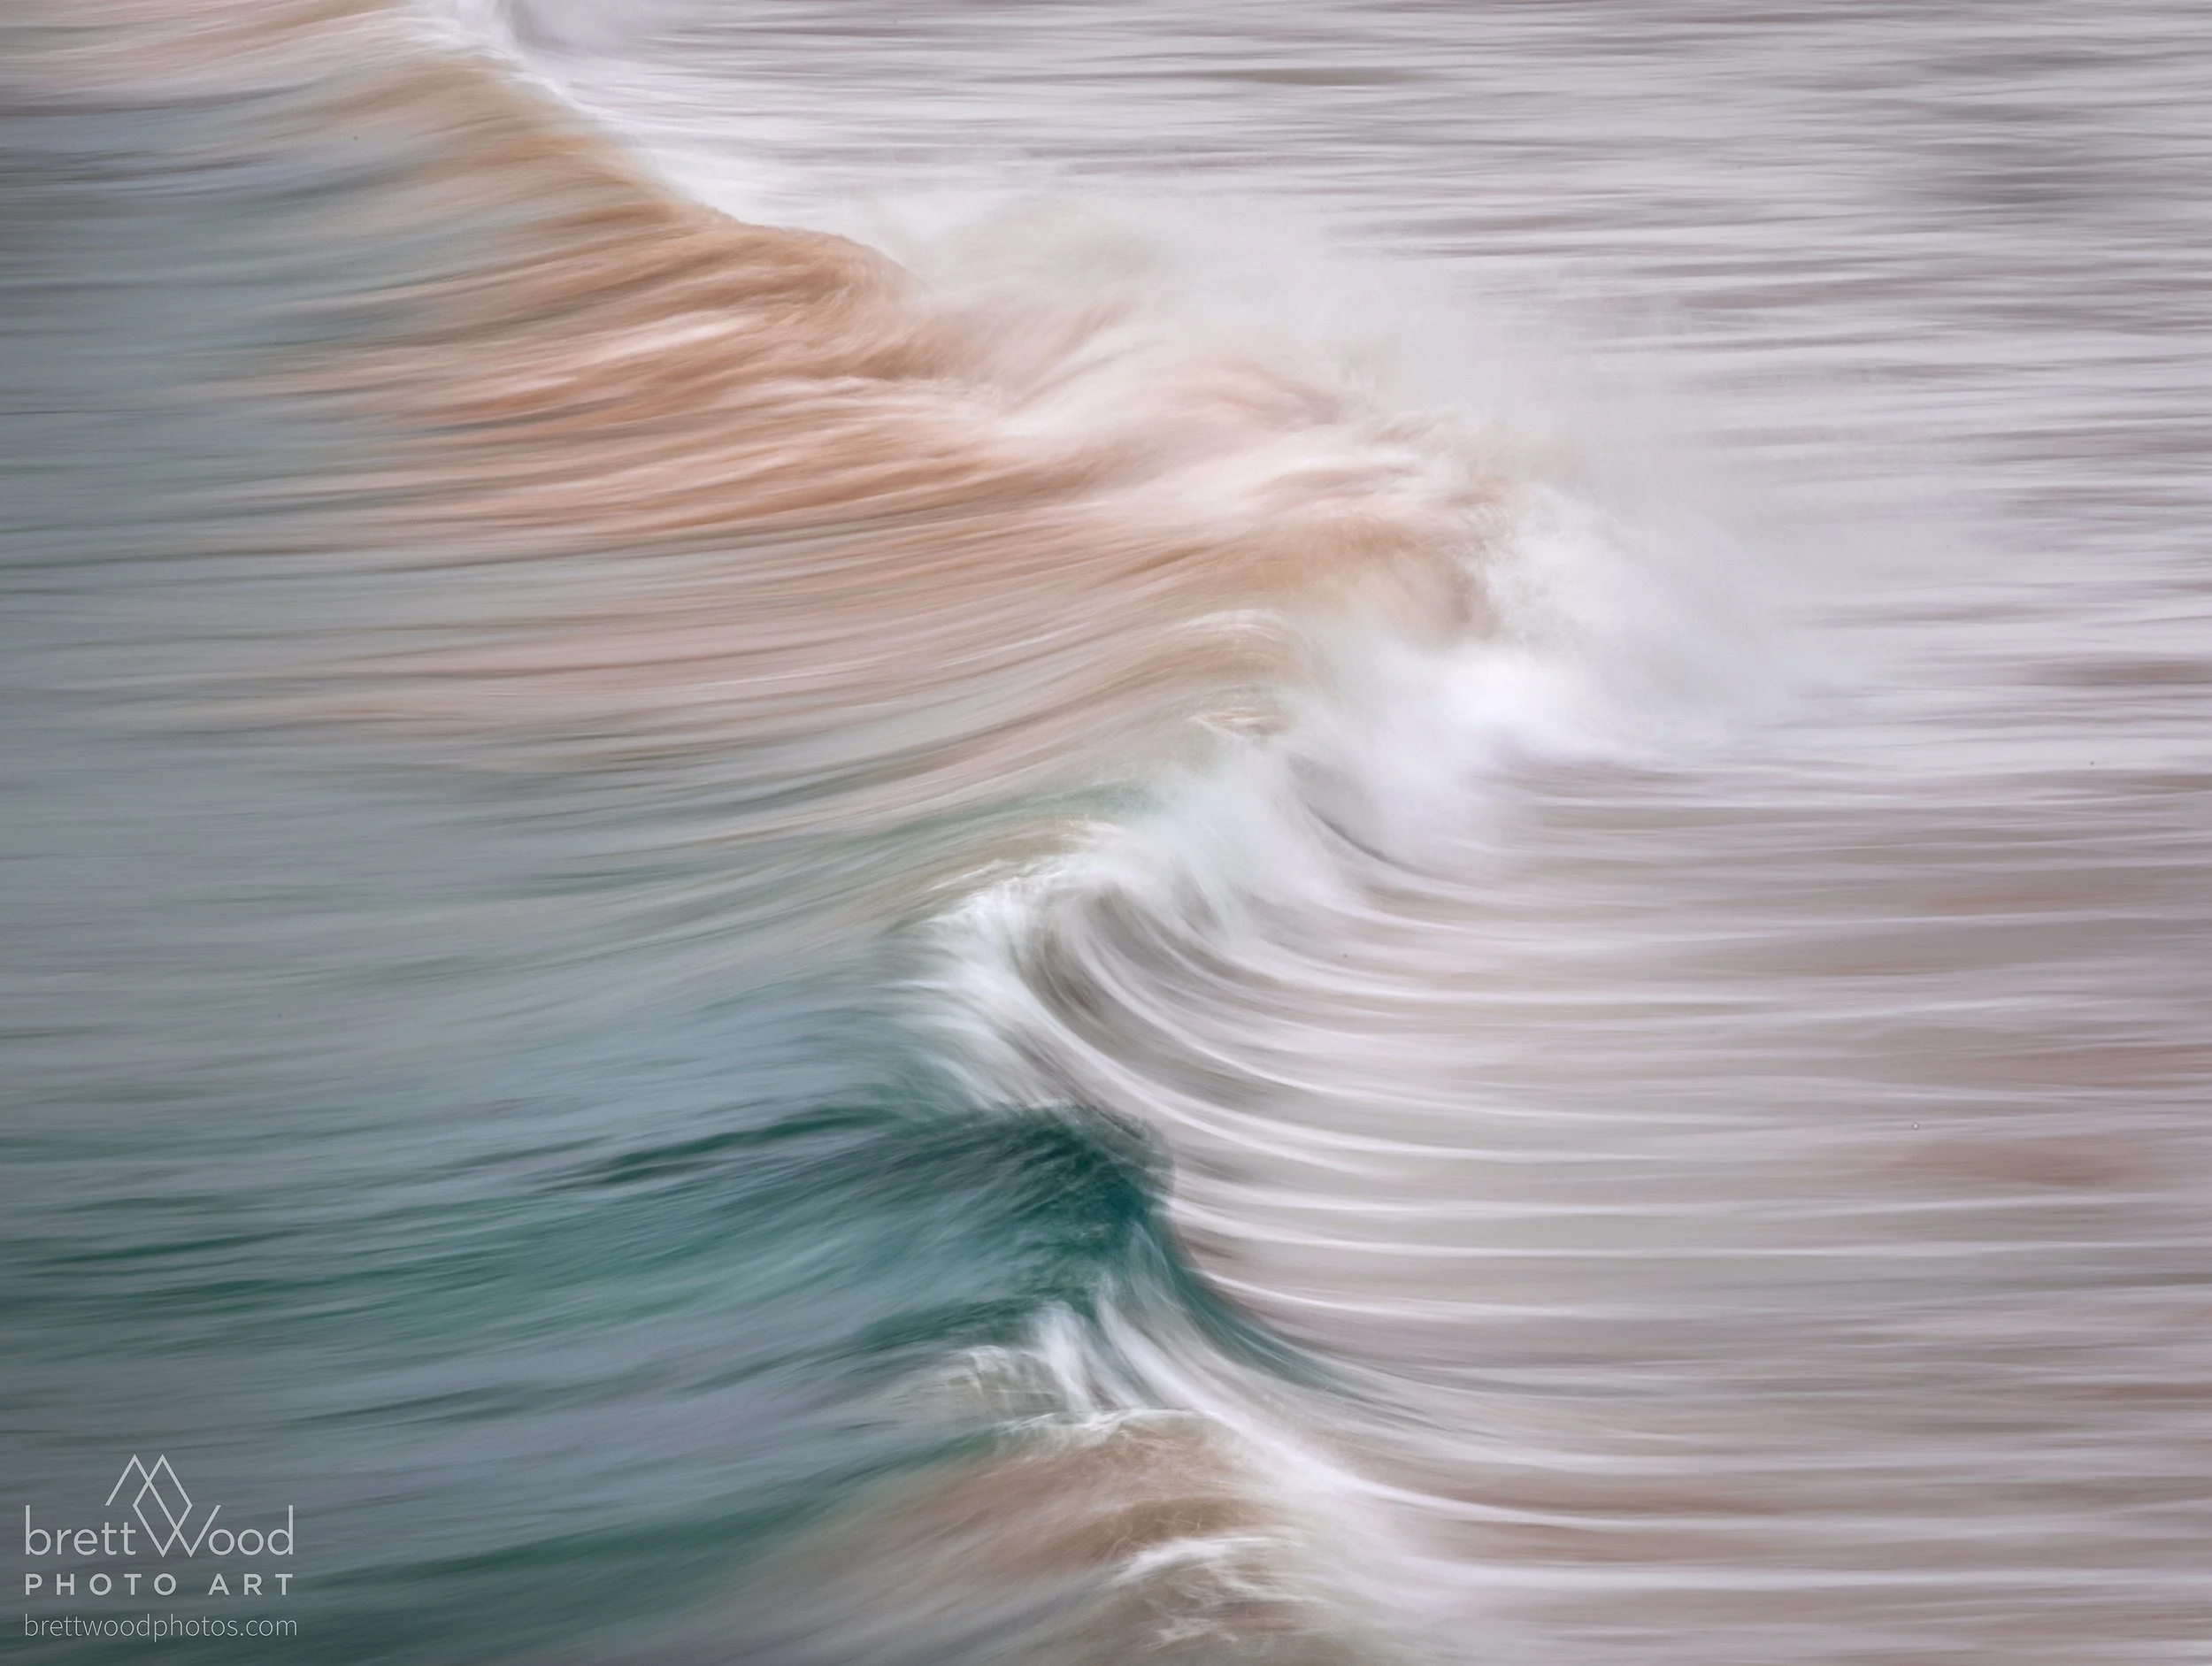
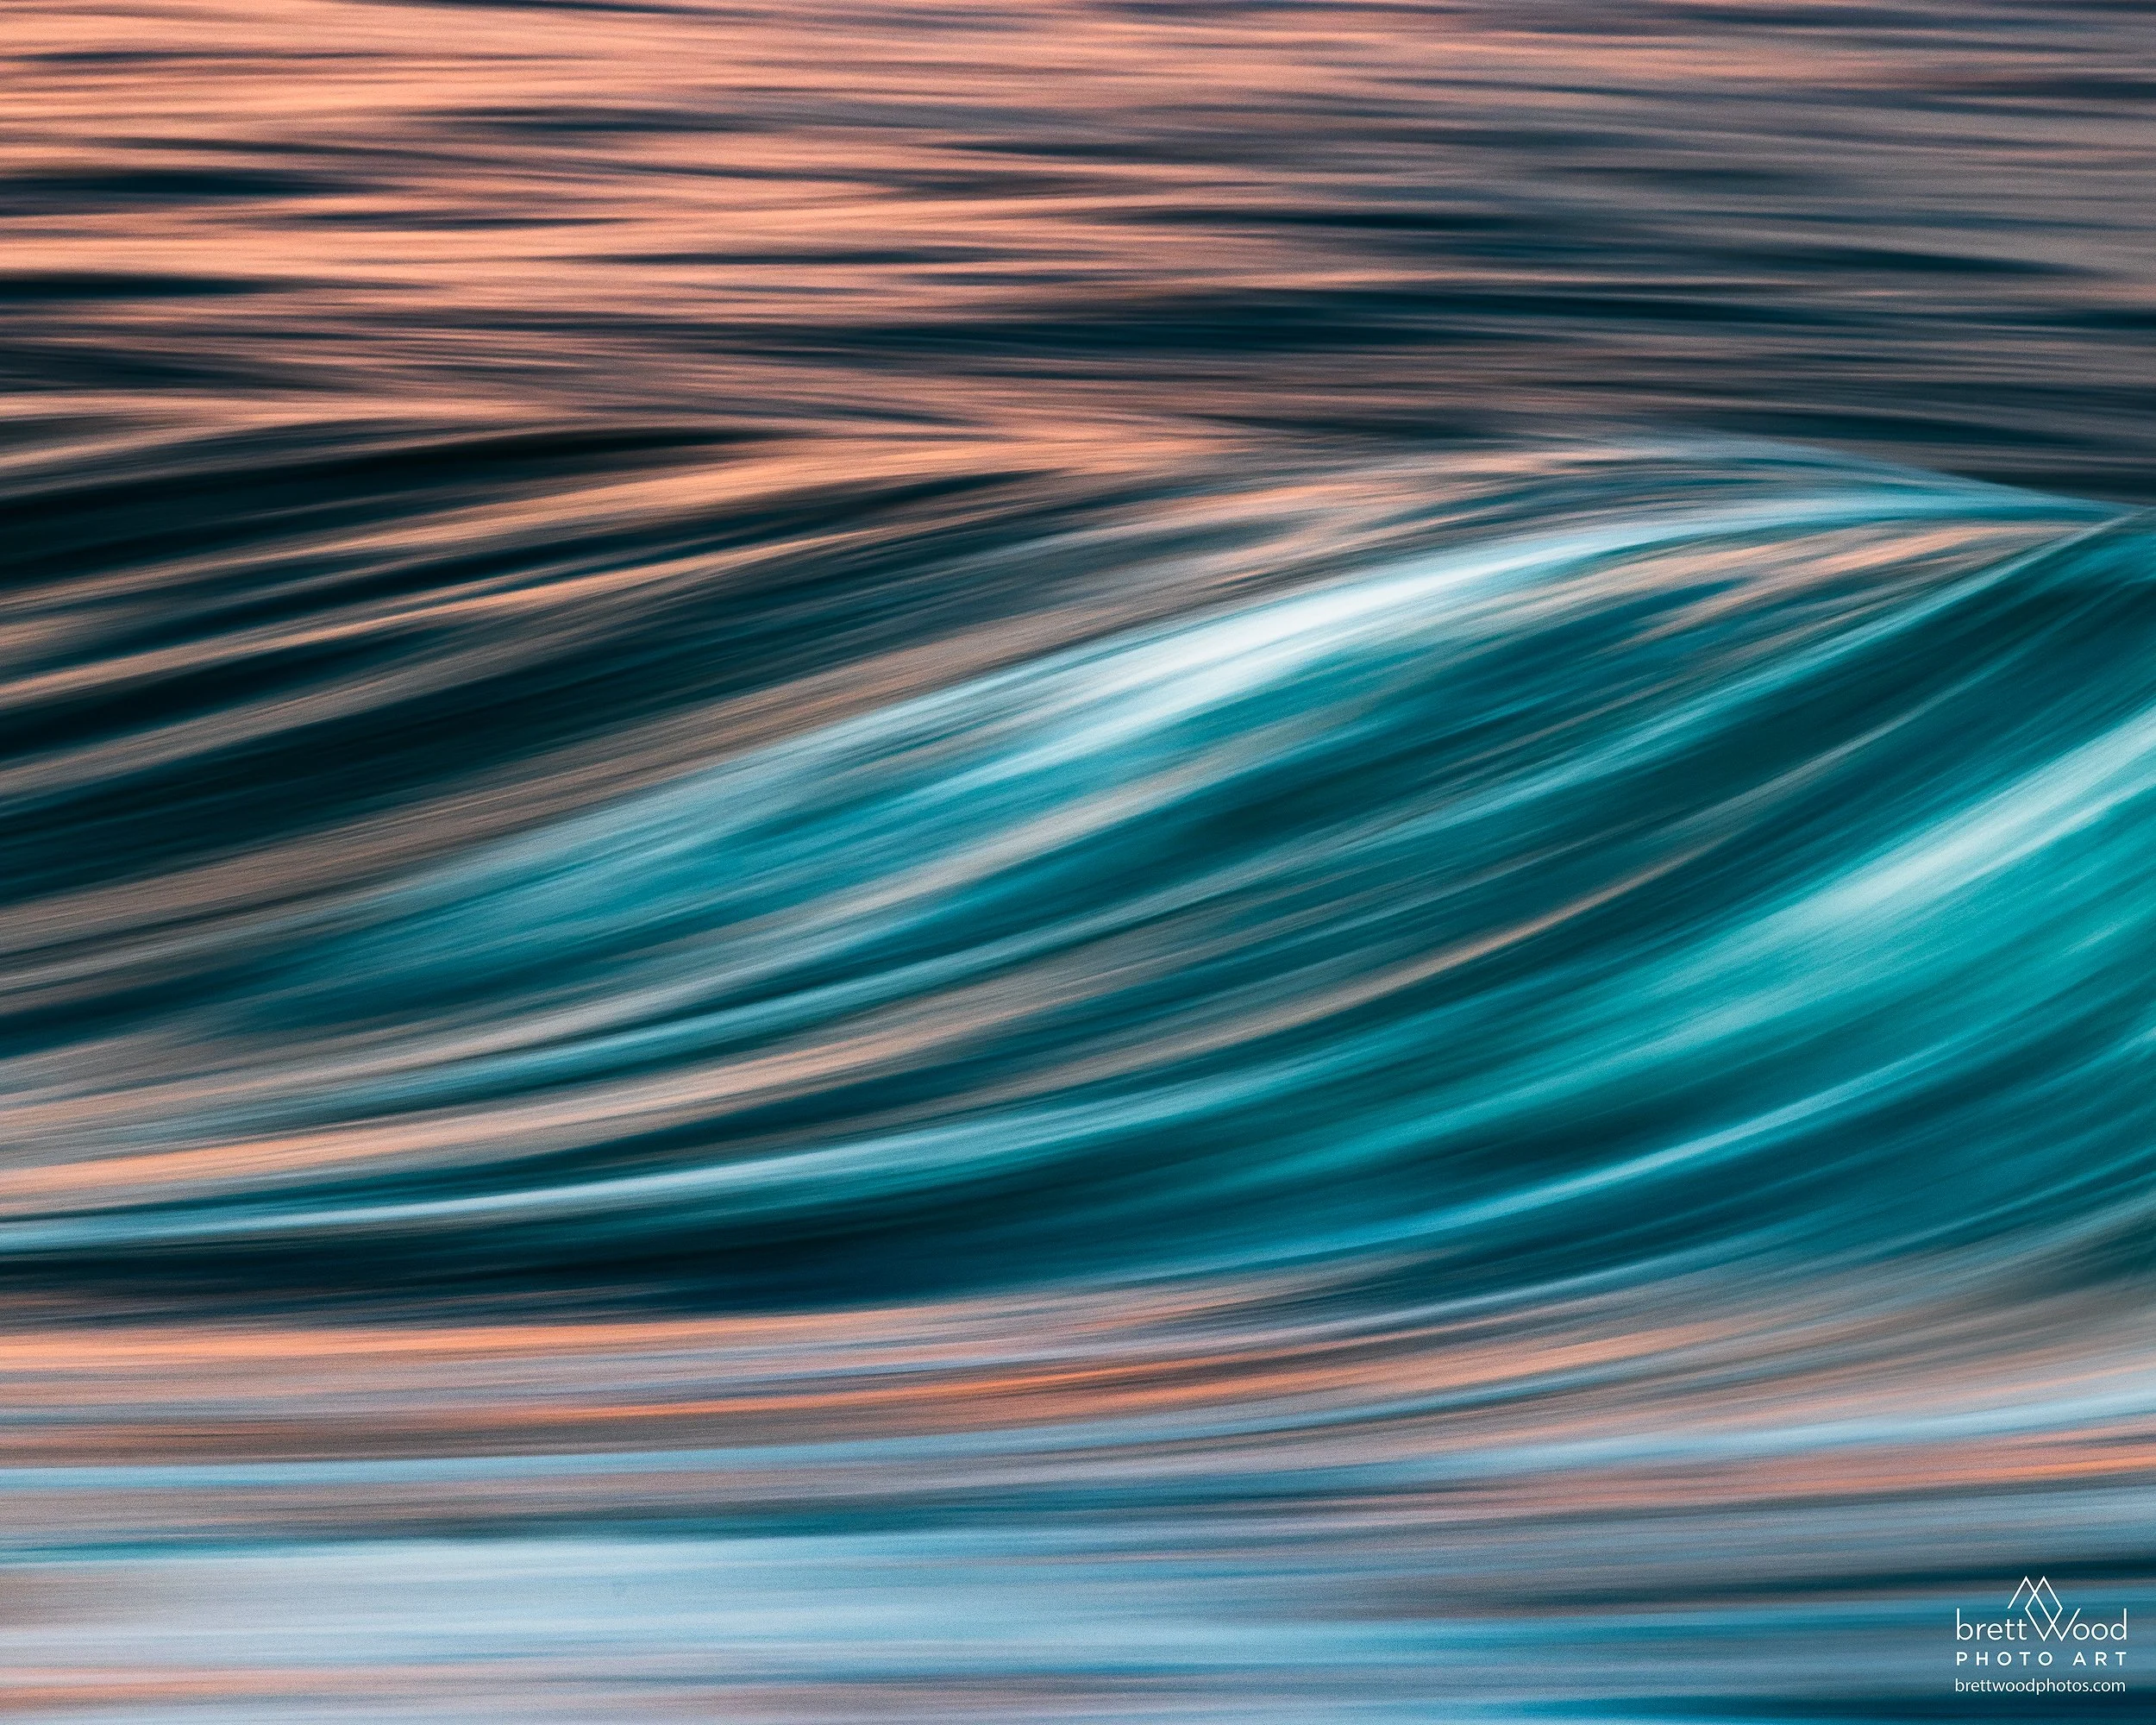
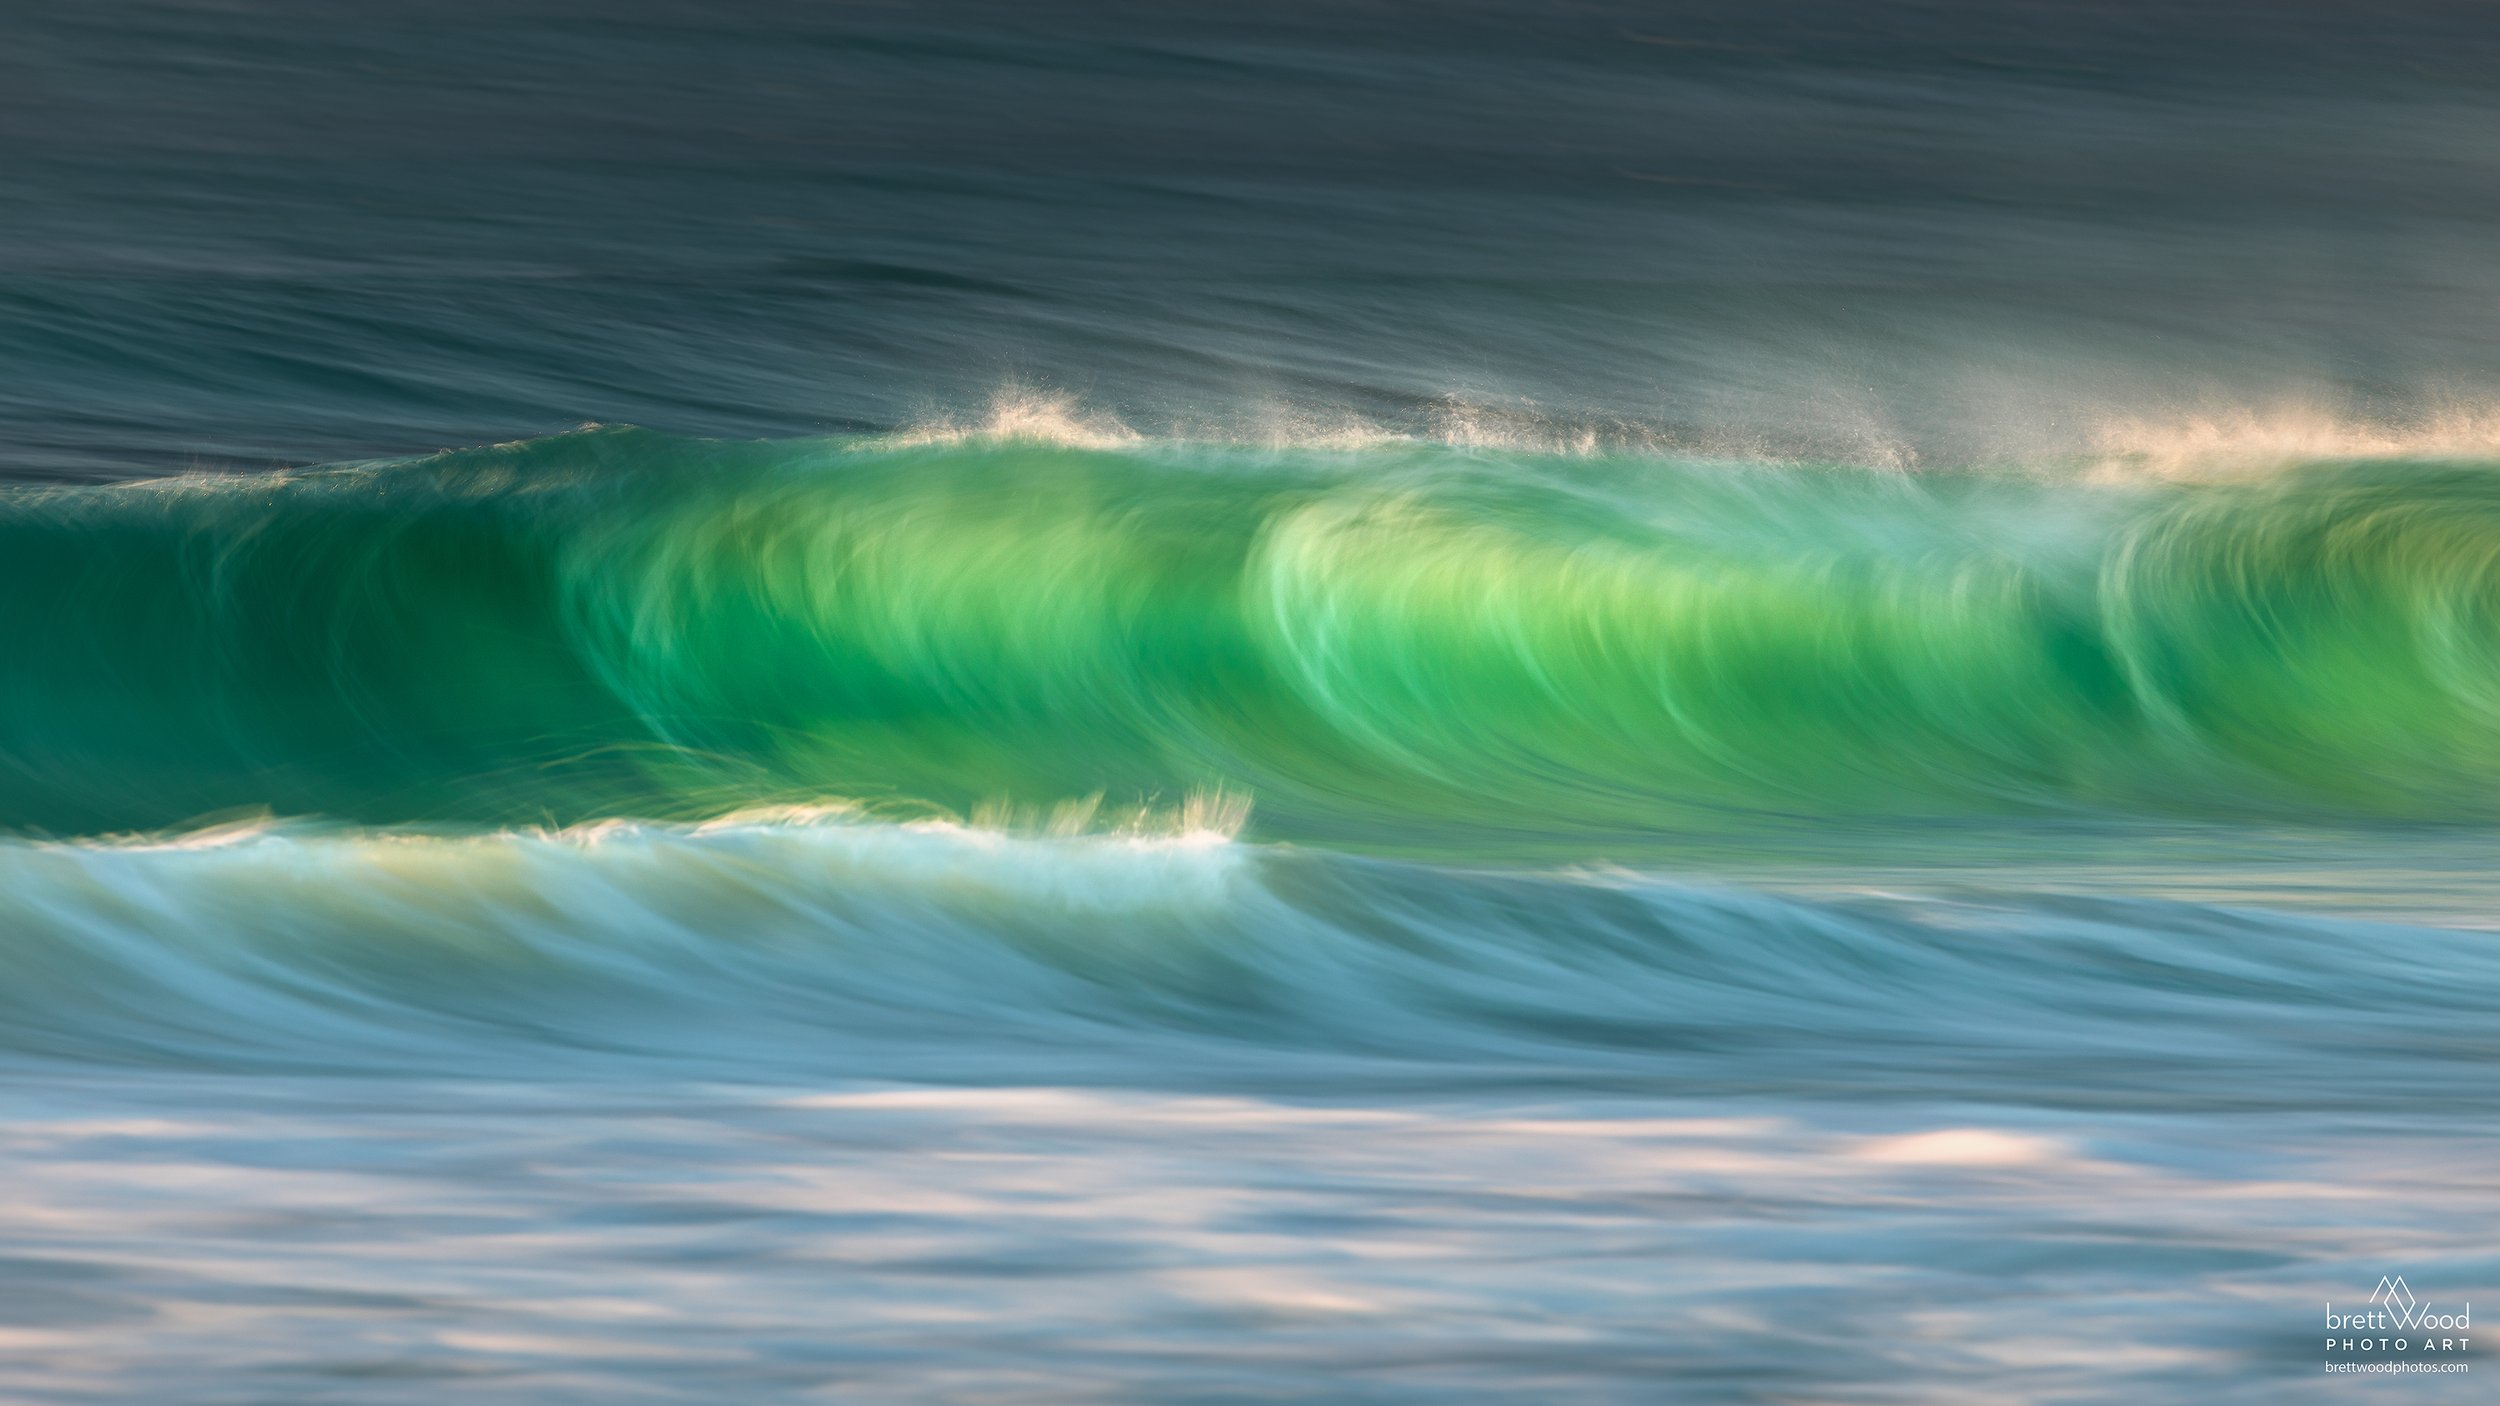
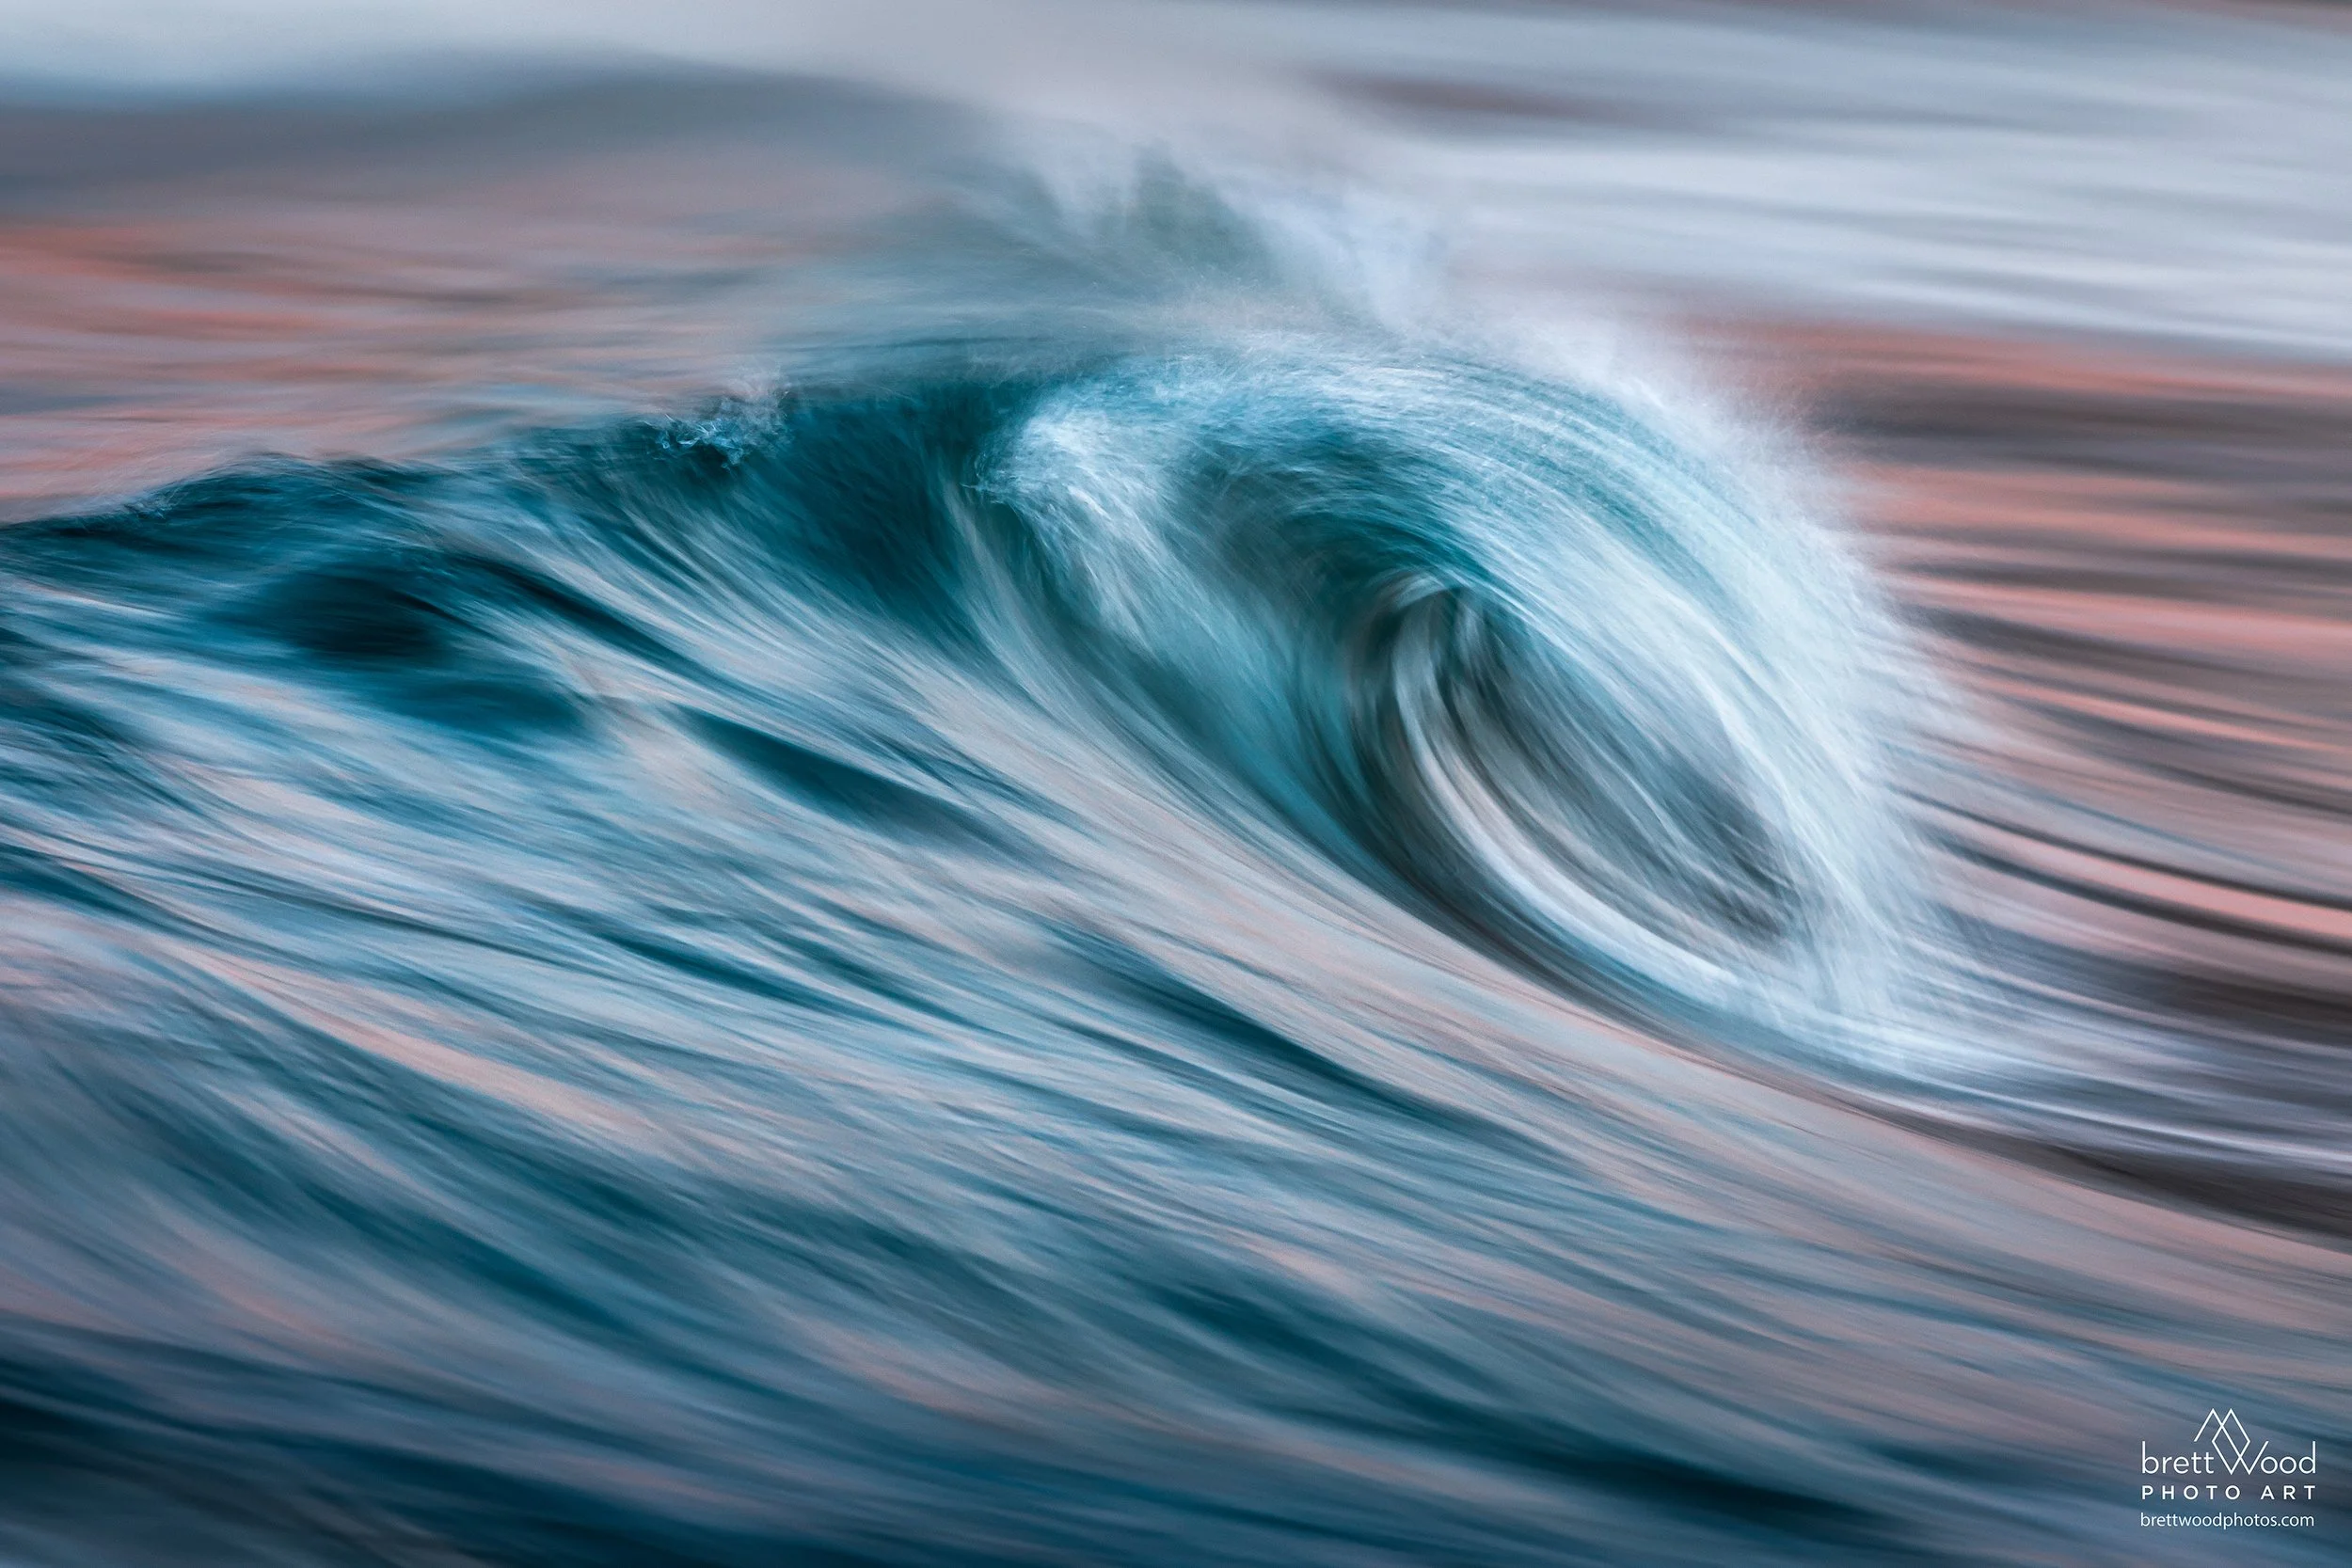
I often position myself at a 45–90 degree angle to the direction of the waves. This composition helps the wave sweep across the frame and creates dynamic lines. If that angle isn’t possible, shooting straight on can still look great — the trick is to experiment and see what composition feels most balanced.
Technique and Settings
This part is where the magic happens.
Set your camera to Shutter Priority (TV) or Manual (M) mode. Make sure your focus mode is set to Servo/Continuous AF so the camera keeps tracking the moving wave and maintains a sharp focus.
My go-to shutter speeds are 1/4 sec, 1/8 sec, and 1/15 sec. I usually start at 1/4 and adjust from there depending on the look I’m going for.
If you’re in Shutter Priority, just set the speed and let the camera handle the rest. If your shots are overexposed, pop on that ND filter. In Manual mode, I typically set:
Shutter speed: 1/4 sec
Aperture: f/8 to f/11
ISO: Auto

Shooting Technique
Now for the fun part!
Zoom in tight to fill your frame with the wave. Lock in your stance — firm legs, still lower body, elbows tucked into your sides for stability. Looking through the viewfinder, track the wave smoothly with your upper body, almost like you’re rotating on a tripod head.
As the wave rolls and shapes, follow it at the same pace and press the shutter just before it crests and turns too white. Keep moving as you press — don’t pause when you hit the shutter.
Expect lots of throwaway shots at first. A single session could easily mean hundreds of frames with only a few “keepers” — but trust me, when you nail one, it feels amazing!
Timing and Light
My favorite times to shoot are just after sunrise or a couple of hours before sunset. The light is softer, warmer, and more flattering. Try to avoid pointing your lens directly into the sun; side lighting usually brings out the texture in the waves beautifully.
Final Thoughts
The most important thing is to get out there, give it a go, be confident, and have fun with it. Don’t stress about perfection — enjoy the process, breathe in the sea air, enjoy nature, and let yourself experiment. Every attempt is progress.
I’d really love to see what you create and hear your feedback! Please share some of your photos and experiences with us — I can’t wait to see how you go with your waves. Brett.